To use the CMU machine shop full time, I had to take a small course on machining. The class was straight forward, and I knew about 75% of what was taught. I did learn a lot though and picked up some new tricks. We learned the main concepts through two small projects, a pencil holder and a plumb-bob, performing the cutting operations ourselves. Once the skill was demonstrated, we moved on, so most people didn’t finish the projects. However, I spent a little time after class putting the finishing touches on the parts. I’ve machined a million parts for previous jobs but never had the opportunity to display them. While these two parts are pretty basic and not a good indicator of my skill level, I thought it would be fun to “do it right”.
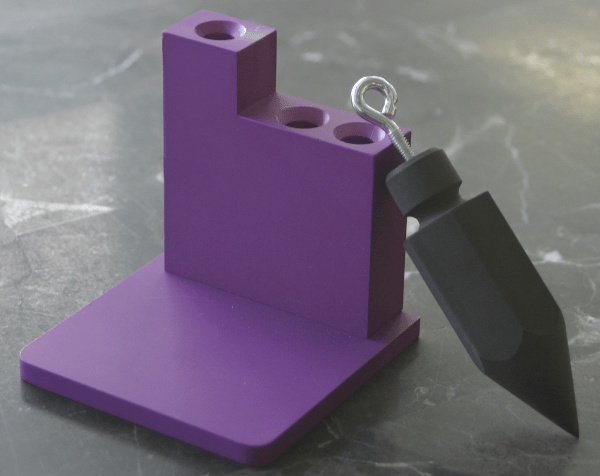
I sand blasted the parts before shipping, and after I got them back, I realized how important the finish is before anodizing. Anodizing won’t smooth out your parts, so if you want a mirror finish after anodizing, you’ll need to polish before hand. Personally, I like the matte finish of these parts. I’m going to give them both away as gifts and I think they’ll last a long time.