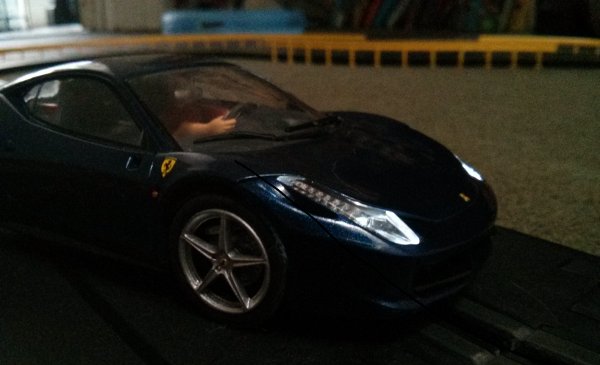
I recently bought a 1:32 scale Ferrari 458 slot car to run on my slot car track. It is a Carrera Evolution analog car. Unlike the 132 Digital version, this car does not come with LED front or rear lights. I thought it would be a fun project to buy an aftermarket light kit and install some myself. After a lot of surgery, I must say this was a complete waste of time and I would not recommend anyone do this ever. The analog cars are decent quality for the price, but they are not “tuner” friendly. The wires are very delicate and the plastic screw holes that hold the body to the chassis are not meant for repeat tightening. However, if you do choose to take this road, here is how I managed to squeeze all of this together.
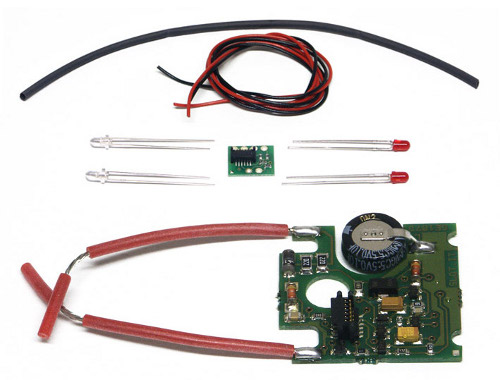
First I ordered the Slot.it SISP06 “permanent” light kit with headlights & tail lights from Professor Motor. Based on where I placed the rear LEDs, they didn’t shine very brightly. I would experiment with brighter red LEDs next time. However, I’d be careful not to overload the voltage/amperage rating on the board. The problem is that this would be trial and error. Professor Motor sells additional LEDs of different sizes (and presumably different intensities). There should be room for the large 5mm LEDs in the car.
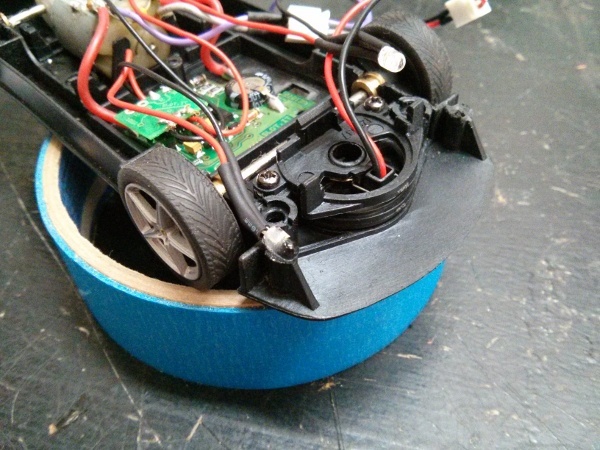
I took the body off of the car and unscrewed the existing control board and magnet holder. I needed a large flat area to hold the large light board but there was no natural place for it.
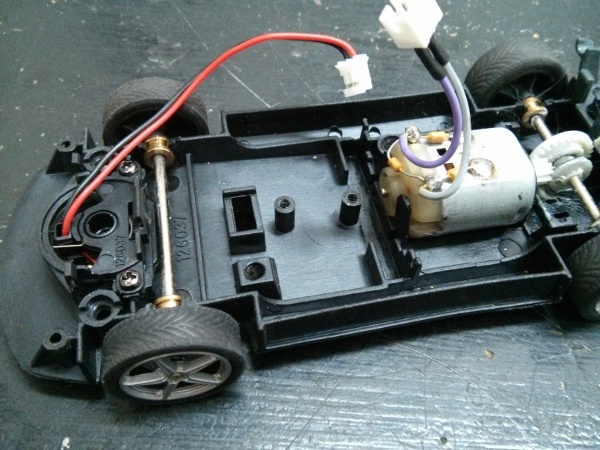
I very carefully Dremeled off most of the plastic posts, leaving just the magnet-holder post. I then used an exacto knife to clean everything up.
The board then fit perfectly.
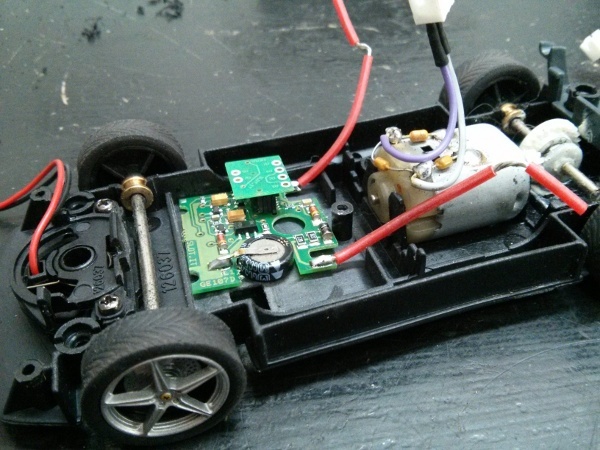
I then needed a way to hold down the light board. I realized that it could mount the existing control board on the magnet-holder post. I could slip the light control board under the existing control board and clamp down to the chassis as I tightened the holding screw for the existing control board.
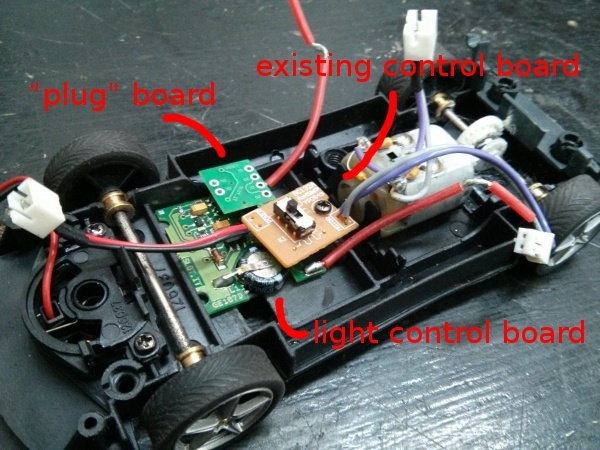
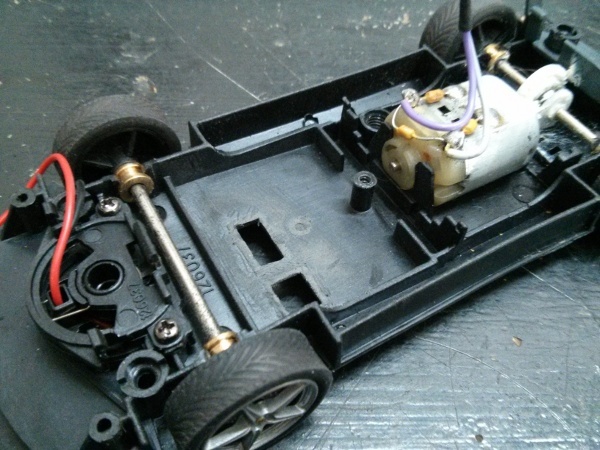
I then soldered the power wires from to the light board to the motor pickups. I first soldered everything backwards as shown in the photo. So I had to resolder it.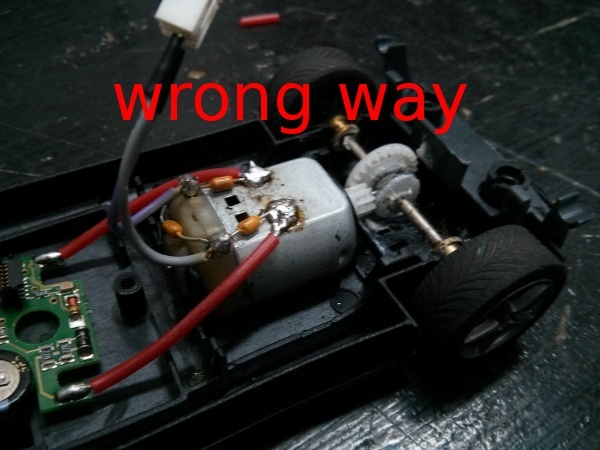
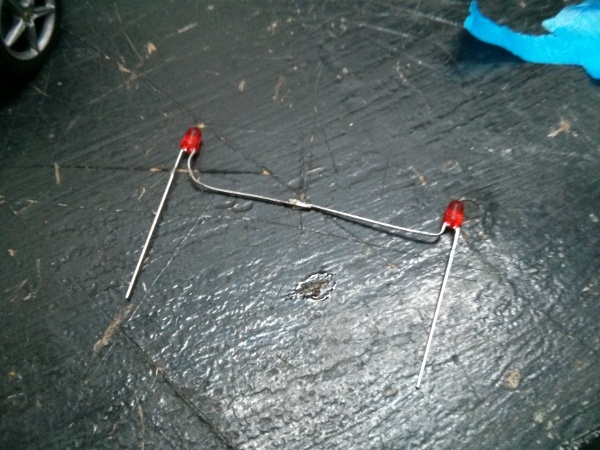
I then setup the rear LEDs. The chassis has build in spots for these LEDs (I suspect they use the same chassis for the 132 Digital car). I positioned the LEDs, soldered them together, and then delicately used airplane glue to secure them to the chassis.
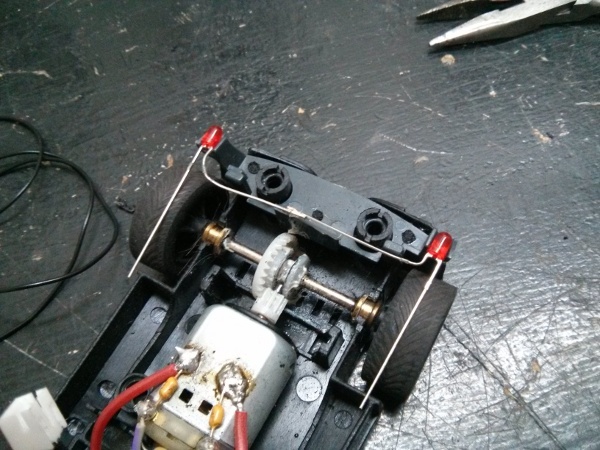
The front LEDs were not so easy to install. I had to manually cut groves in the plastic with a Dremel. I then glued those LEDs down as well.

I then soldered the four LEDs to the included “plug board” with included wire. After that I just put the body back on the chassis and gave it a spin. I’m surprised how well this turned out. But I have to say that I would not have done this if I had known how tedious it was. In the process of positioning and repositioning the boards, I broke every existing wire and eventually resoldered the entire car.
As an old time slot racer from the 60s I’m 85 now I must say you must have the patients of Jobe. I did a lot of instruction sheets for TYCO early on when they started in Woodburry Hts. NJ. so I can appreciate the work you did and the excelent photo’s. I say WELL DONE!