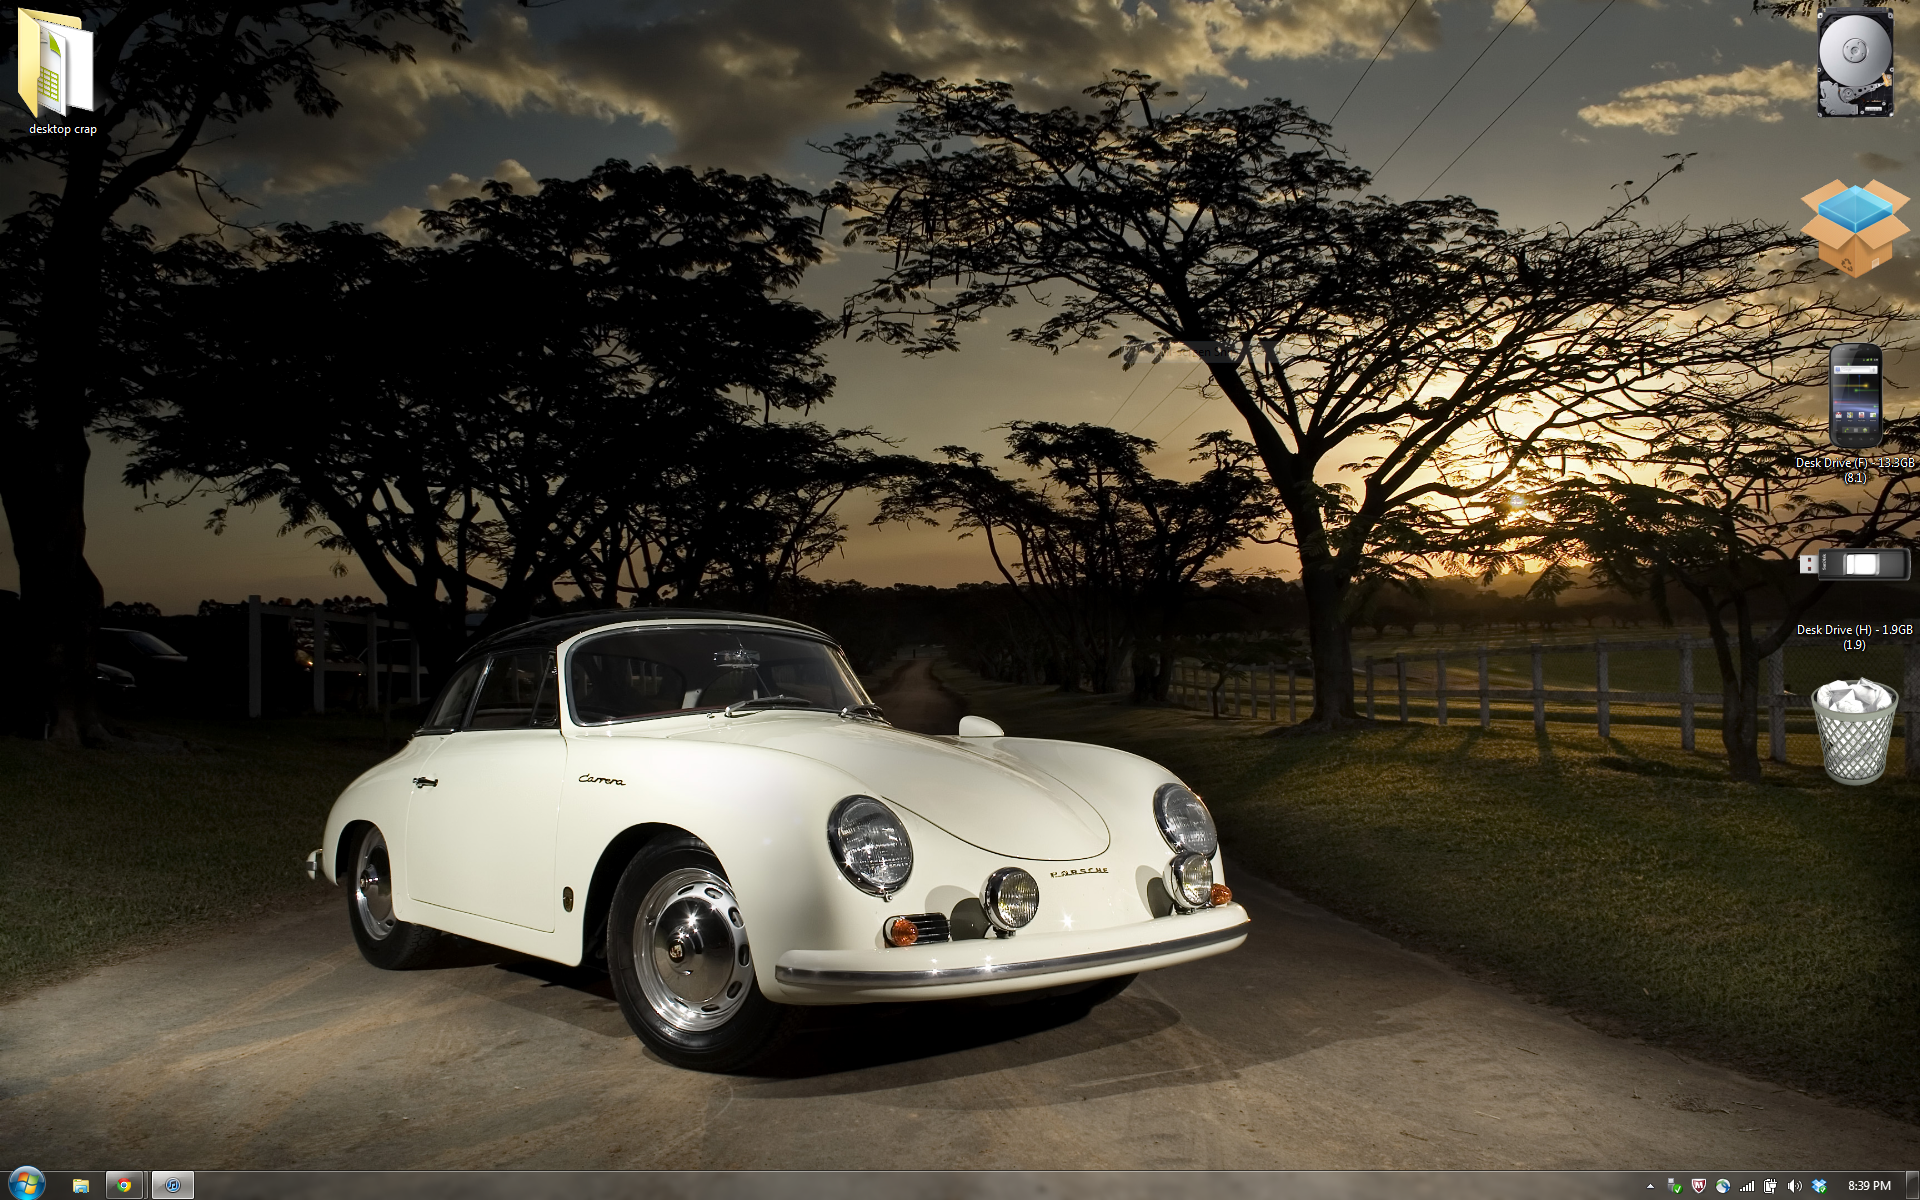
I have a lot of USB devices which I’m continually plugging/unplugging from my Windows 7 machine. I wanted some custom icons to appear on the desktop when specific devices are plugged in. I hacked together a solution from several other people’s solutions around the web to put together a (hopefully) complete how-to:
Download an image of your favorite device. This is as simple as using Google Image Search. You are looking for a professional-quality photo of your device, something used in a review or news article. You don’t want Joe Schmoe’s digi-cam shot of his new iPhone. You also don’t need a super high-res image; 600×600 pixels should be sufficient. The critical thing is to get an image on a solid, preferably white, background. Also avoid any image with mirroring, shadowing, or glare.
Make the background transparent. Follow this GIMP tutorial to make your image transparent. You only need to follow the background removal section of the tutorial. The resizing and icon generation will be done later. You’ll have to save your image as a PNG, because JPEG doesn’t support transparent background.[iframe src=”https://www.youtube.com/embed/IjwclFiIBbM”]
Convert to .ico. There is a really nice site which will take your image and automatically generate a .ico file for Windows. iConvert Icons can handle transparent background images. It also generates icons for a wide variety of OS’s. Simply upload your file and then download the .ico file.
Set the icon of your device. If you are using a USB flash drive you can create a autorun.inf file which will automatically set the icon when you plug in the device. “Option 1” under this Windows 7 forum post explains how to do this.For Android devices, like my Nexus S, you have to take a more complicated approach because Android will automatically delete an autorun.inf file. This method is also documented in the above forum as “Option 2”. I also did this for my internal HDD (C:/).
Get the icon to show up on the desktop. So far the icon has been changed but only in the Computer folder:
To get the icon to show up on the desktop when plugging in the device, I am using DeskDrive. There are several programs which do the same thing but this one worked for me. A quick install and configuration will get the auto-display-to-desktop working. I opted NOT to have the C:/ drive displayed this way. Since its a static drive, I simply created a windows shortcut and dragged it to the desktop. The next step explains why I treat my internal HDD different from my phone.
Remove the icon text. You’ve taken all this time to make a beautiful icon but you’re stuck with stupid Windows trying to put a text label underneath every icon. No problem. Make it disappear with this quick hack. The one problem I encountered was trying to do this for any icon generated via Desk Drive. Desk Drive needs to remember the name of the shortcuts it generates so that it can properly remove them at shutdown. If you change the name of a Desk Drive generated shortcut, it will show up twice on restart. If anyone knows how to fix this please let me know!
Enlarge your desktop icons. Things are starting to look really slick but why settle for small icons? Another quick hack can enlarge all of your desktop icons. The “mouse wheel” method worked for me.
Remove the arrow from the shortcuts. Because the actual drive is mounted at the root directly, the link on the desktop is a shortcut. To remove those silly arrow overlays on the icons I used “Vista Shortcut Overlay Remover” (which works for Windows 7) as described here. You’ll have to restart your machine at this point but don’t worry. I’ll be here when you get back.Now you’re done with the basics. The following tips just complete the whole package.
Auto-Enable USB storage on Android devices. Normally when you plug your Android phone into a USB port, your phone will ask you to confirm that you want to allow the PC access to your SD card. To bypass this, install the Android App “Auto Mount Your SD Card”
Add some other good looking icons. I grabbed some slick DropBox icons from Jackie Tran and removed the shadowing. I also grabbed some Trash icons from Finlay Paterson. For the Trash icons, I changed them using built-in Windows method.
Get rid of all of the other crap on your desktop. Seriously, just move it into another folder.
Get your other non-storage devices to show up. This one is tricky but should be do-able. I have other projects relying on USB hardware. I think it would be cool if when I plugged in my Arduino, an Arduino-looking shortcut to the Arduino IDE popped up. It definitely looks like its possible. I don’t have the .NET experience to get this working though.
Change the icon for your phone. I had a reason above for recommended not to use glared phone images. It should be pretty easy to grab a screenshot of your phone’s front page (on Android may require rooting). You could then insert that screenshot into the stock phone image for generating icons. Give it a shot, tell me how it turns out.