SLAM-5 Bot part 1: The Hardware

I recently purchased Lego’s new NXT hobbyist robotics kit. After familiarizing myself with the basic layout of the command module, available hardware and sensors, and third-party programing languages by building several single-task robots, I decided to use the NXT as a forum for my studies in SLAM robotics. As I have previously quoted, Dr. John Leonard of MIT says,

The problem of SLAM is stated as follows: starting from an initial position, a mobile robot travels through a sequence of positions and obtains a set of sensor measurements at each position. The goal is for the mobile robot to process the sensor data to produce an estimate of its position while concurrently building a map of the environment.

My goal and new perspective on the problem is to design a system which is as simple as possible. I immediately realize that much of the complication in SLAM systems lays in the timeliness with which the system processes information in real time. I know that some compromise between speed and simplicity had to be established, and in pursuing the most simple system, I am willing to sacrifice a lot in speed. So I have created what I am calling the “slam five robot”. The real acronym is S.S.S.S.S.L.A.M. which stands for “super-simple, super-slow, simultaneous localization and mapping robot”.

The system consists of three components: the physical hardware of the robot, the control algorithm which guides the hardware and sensors, and the post processing algorithm which interprets the sensor data. I begin here by describing the hardware and sensor setup.

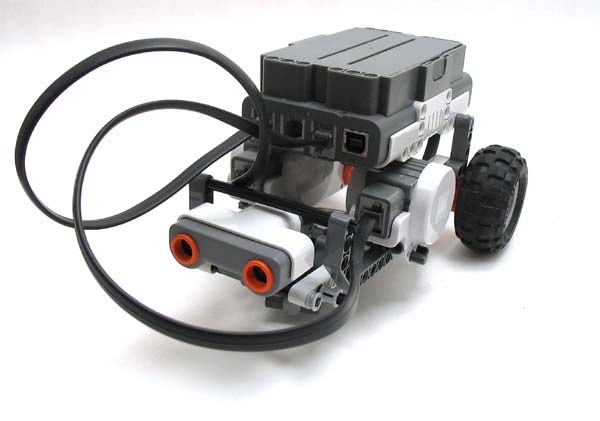
Front view of the SLAM-5 bot, showing ultrasonic range finder and wiring for the drive motors.

Continue reading “SLAM-5 Bot part 1: The Hardware”

Wankel Rotary Engine CAD conversion

3/7/2017 UPDATE: A commenter made some nice updates to both the translation and the geometry of the project. Be sure to read Martin’s comments below.

1/2/2014 UPDATE: After some interest from other folks in this project, I’m sharing all of my final Solidworks files. I’ve talked with the original sponsor and he has agreed to release them. You can download a zip file here. The files are organized by part. All of the final drawings and parts are annotated with “_finished” in the filename.  Some of the original scans are also included.

3/31/2013 UPDATE: A kind reader has found the original drawings in a model airplane magazine from 1964. I’ve included the PDF below in the Resources section. The blue prints are on pages 17-18. It is interesting to note that the model was submitted as an entry to a contest to generate an epitrochoidal engine (an epicycloid is a type of epitrochoid). However, as I show below, the chamber isn’t an epicycloid.

I have been contracted to convert the SW92 Wankel rotary engine from its original 1950’s paper format (in German) to electronic format (in English). I am utilizing Solidworks 2005 to reconstruct 13 of the 36 pieces included in the blueprints. Furthermore, I am relying on a tremendous effort from MacField Young to perform most of the German to English translations. The sole purposes of this blog entry are to communicate with my contractor, to document my progress, and relay certain concerns. In other words, this entry is a work in progress finished!.

complete-exploded-view_small.png Continue reading “Wankel Rotary Engine CAD conversion”

DIY: Shoes, Dye and Paint

As a Christmas present, I decided to dye and paint a pair of shoes for my sister. I wanted them to match some clothes I bought her for her birthday. I also knew that I liked the Van’s Prison Issue #23 shoe (which I bought from Abbadabba’s), so I bought RIT Fabric Dye and generic fabric paint. The canvas/rubber combination of the shoe served as the perfect setup to add color without loosing the white soles. I started with the buff white / true white shoe, dyed it pink, and painted-on white flowers.

kates_after

Continue reading “DIY: Shoes, Dye and Paint”

Light Bulb Efficiency Calculator

8/18/2012 UPDATE: From the comments, Andy pointed out that I had a mistake in my calculations. In the c_total equation, I should have divided by 1000, instead of multiplying by 1000. After he pointed this out, I checked the java script code as well. I had made an even more egregious mistake there. I had correctly divided by 1000 but I also had divided by power cost (dollars per kilowatt hour). I’ve now fixed the equation and the script. I also regenerated the results from the examples.


I am slowly upgrading the incandescent light bulbs in my house with more efficient compact fluorescent light bulbs. However the higher purchase price of the new bulbs has me wondering if they are actually “worth it.” I also thought whether an even more efficient type of bulb, perhaps an LED light bulb, would be better.

bulbs.JPG

So, I set out to determine a value which would best quantify the “worth” of different bulbs and rank each based on this value. Continue reading “Light Bulb Efficiency Calculator”

Peaucellier-Lipkin Linkage

I created a Solidworks model of the Peaucellier-Lipkin linkage to better visualize the kinematics of the linkage and to document my Solidworks CAD capabilities. I modeled several parts: pins, links, and brackets. The brackets have zero degrees of freedom to simulate being secured to the ground. The links are of lengths 50, 75, and 150mm from axis to axis.

SolidWorks model of the Peaucellier-Lipkin linkage

I also generated a .gif animation to show the pure translation of the end joint (shown as the red pin). I have posted here all of the CAD files.

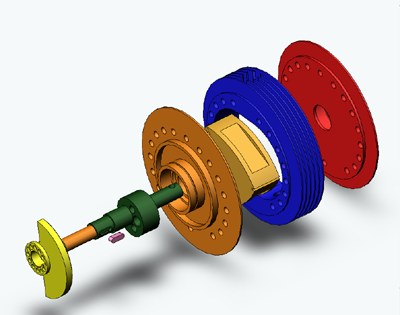
(7-Zip of complete SolidWorks parts and assembly)
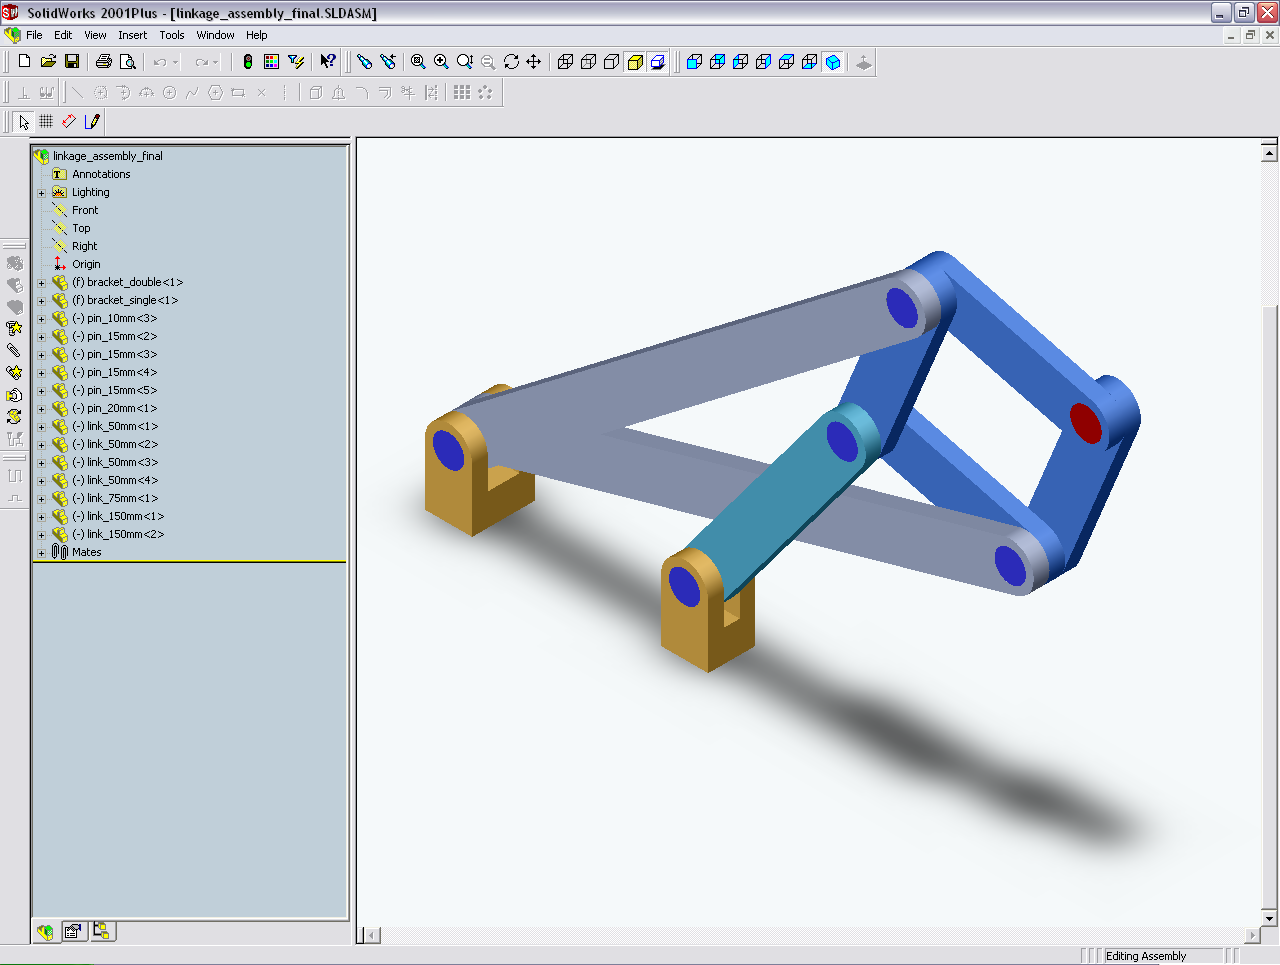